AWS Elastic Beanstalk Instruction for Web Application
Published:
This instruction will introduce how to launch web application on Amazon AWS Elastic Beanstalk with Python, connect to EC2 instance for the application, and create the environment properly for the application.
Preparation before launch web application in AWS Elastic Beanstalk:
- Make sure your web app was created in a virtual environment.
- Go to the directory where the virtual environment is and activate it through "._your_virtual_environment_name_\Scripts\activate" for windows operation system (Reference: https://docs.python.org/3/tutorial/venv.html). Save the installed modules in this environment using " pip freeze \> requirements.txt".
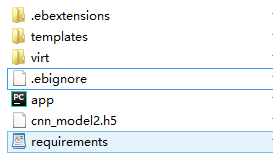
- Add an .ebignore file to tell the EB CLI to leave out the virtual environment folder, if you need. Inside this file, you should write your virtual environment folder name.
- Create a folder named ".ebextensions".
- Inside the above folder create a txt file and write the information shown in the figure below.
option\_settings:
  "aws:elasticbeanstalk:container:python":
  WSGIPath: app:app
- Finally, zip the whole application folder.
Tips:
- If you develop your web application in windows operation system, it's necessary to test your application first in Linux environment and to export the requirements.txt using the command mentioned above.
- If the model used in your web application is created by Tensorflow module, make sure in this application you will use the same version of Tenforflow to load the model as you create it.
- If NLTK module is involved in your web application, don't forget to programmatically install NLTK corpus through Python scripts by adding an argument to the nltk.download() function.
Notice:
Since the memory of AWS EC2 instance is limited, one error that may occur is " instance deployment failed to install application dependencies" during the process of launching the web application, if the memory limit is reached. There are two possible solutions for this case. One is to only install certain packaged needed in this application. The other is to use EC2 instance with higher memory capability.
Now you can set up to AWS Elastic Beanstalk through following the steps below.
Open the terminal in your local system.
Run this command to quickly set and view your credential, region and output format. The following example show sample values.

Replace AWS access key id and AWS secret access key to your own ones.
Create a web app and choose the platform.
$ eb init -p python-3.7 flask-tutorial --region us-east-2
Note: please choose the one match with environment where you developed your web application.
Connect to the EC2 instance using SSH
$ eb init
Do you want to set up SSH for your instances?
(y/n): **y**
Select a keypair.
1) my-keypair
2) [Create new KeyPair]
Create an environment and deploy your application.
$ eb create flask-env
If you don't configure instance information, the default instance will be t2.micro (free tier). You can set up instance through add "-i INSTANCE_TYPE_NAME" to this command line.
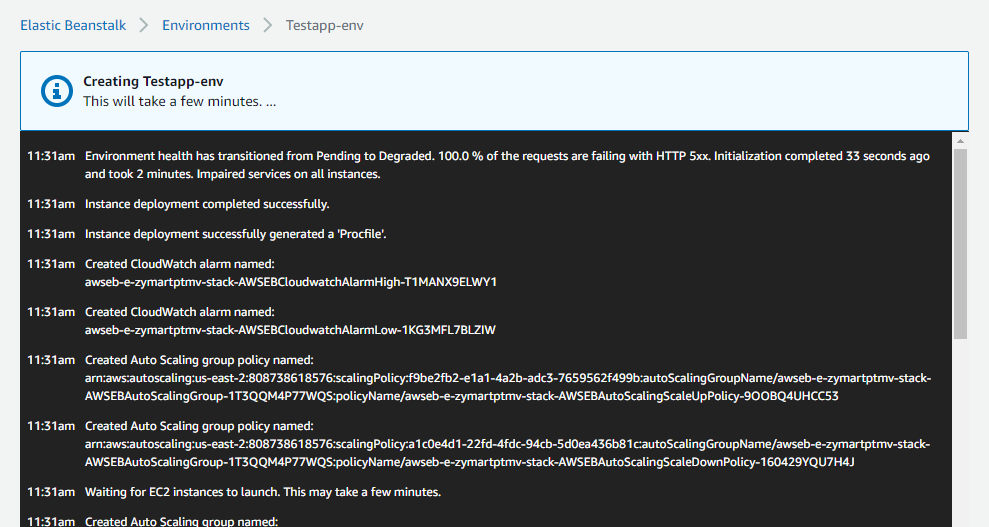
After that, you need to wait for a while to launch this application. On the AWS Elastic Beanstalk session, you will see your application is in the process of launching as shown in the figure below.
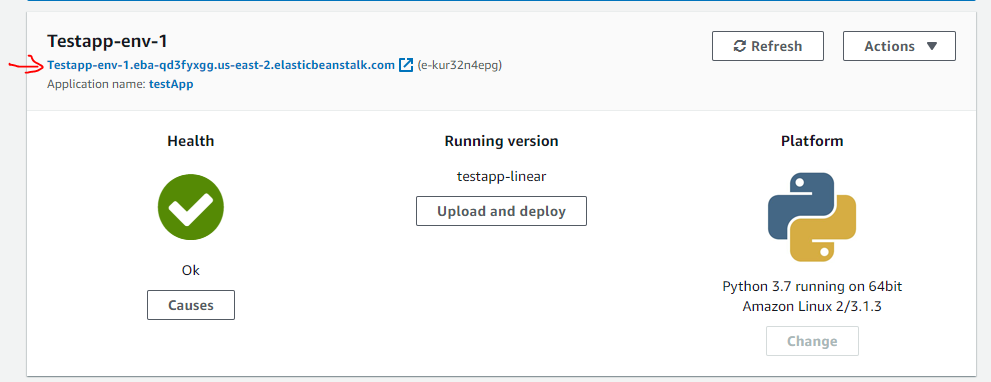
After this process, the page will be changed as the figure below and then you can open your server link to start your web application.
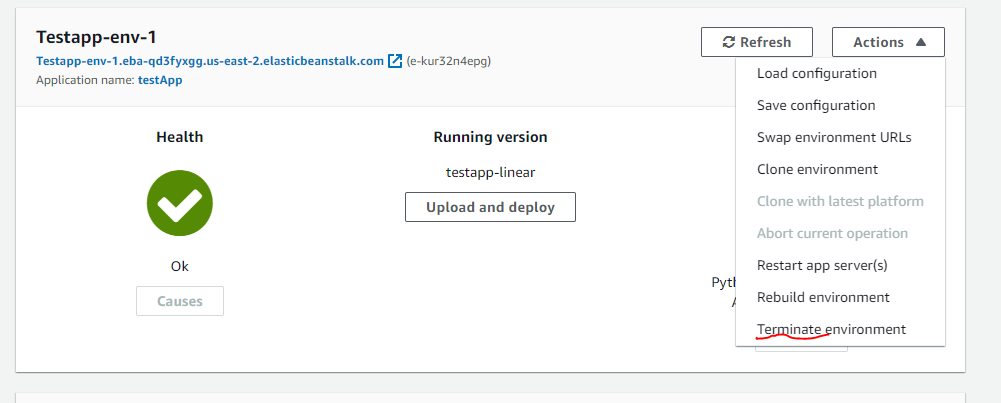
Stop this application through "Terminate environment"