
AWS EC2 Instruction
Published:
This instruction will introduce how to sep up twitter scraper on AWS EC2, install python packages for EC2 instance, and deliver output file from EC2 instance to S3 storage.
Step 0: Install PuTTY in windows
PuTTY is a free implementation of SSH for Windows. You can download the PuTTY installer from the following link: https://www.chiark.greenend.org.uk/~sgtatham/putty/latest.html
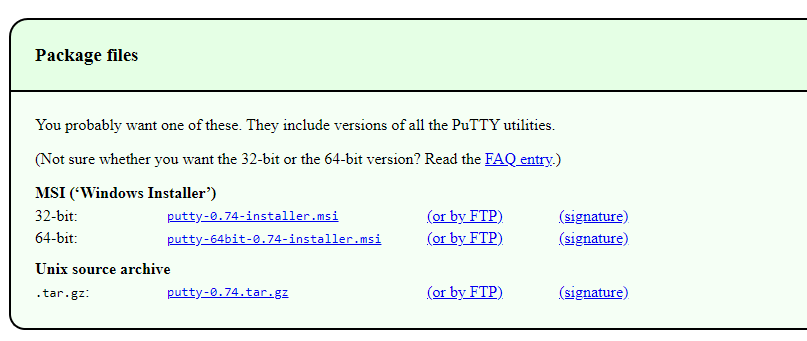
Choose the version you need for your windows system accordingly.
Step 1: Login in Amazon AWS and launch an EC2 instance.
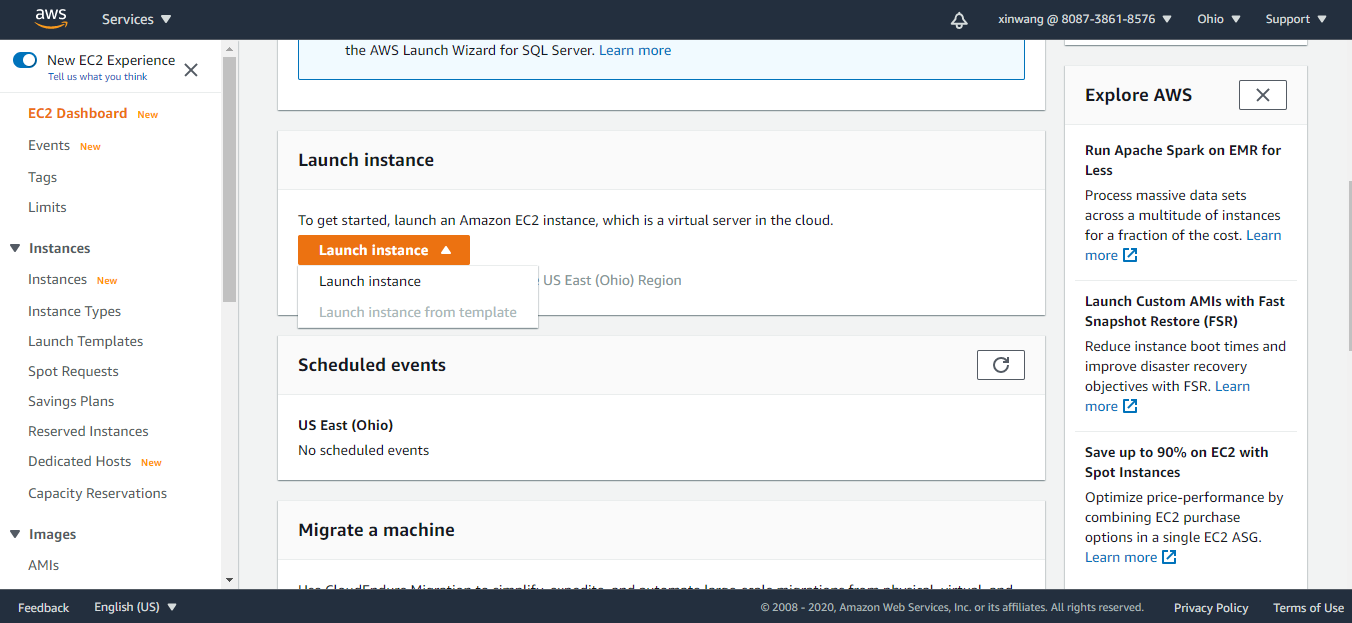
After you login your account, open the services and go to EC2 dashboard.

Click "Launch instance" under the drawer of "Launch instance".
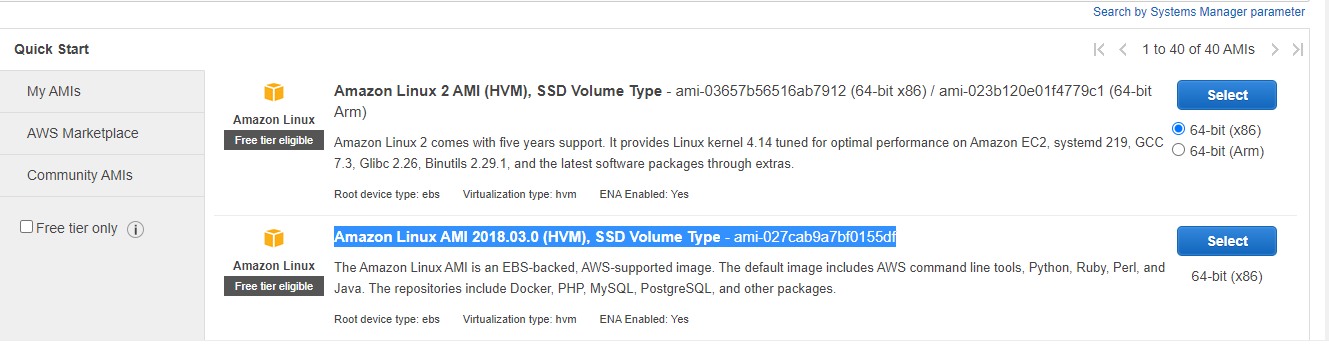
Select "Amazon Linux AMI 2018.03.0 (HVM), SSD Volume Type - ami-027cab9a7bf0155df" as Amazon Machine Image (AMI).
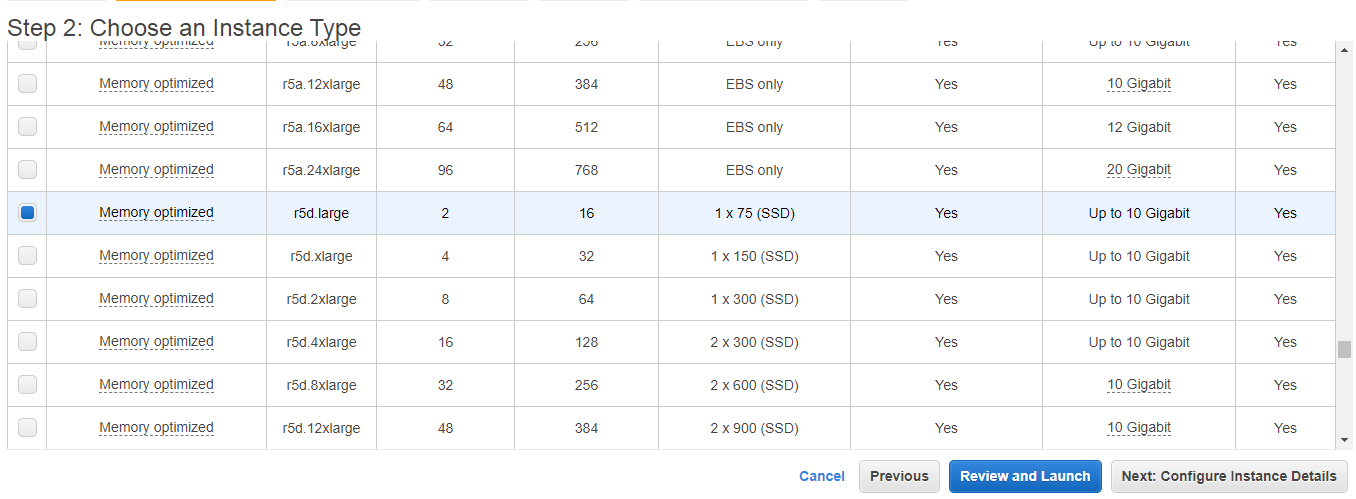
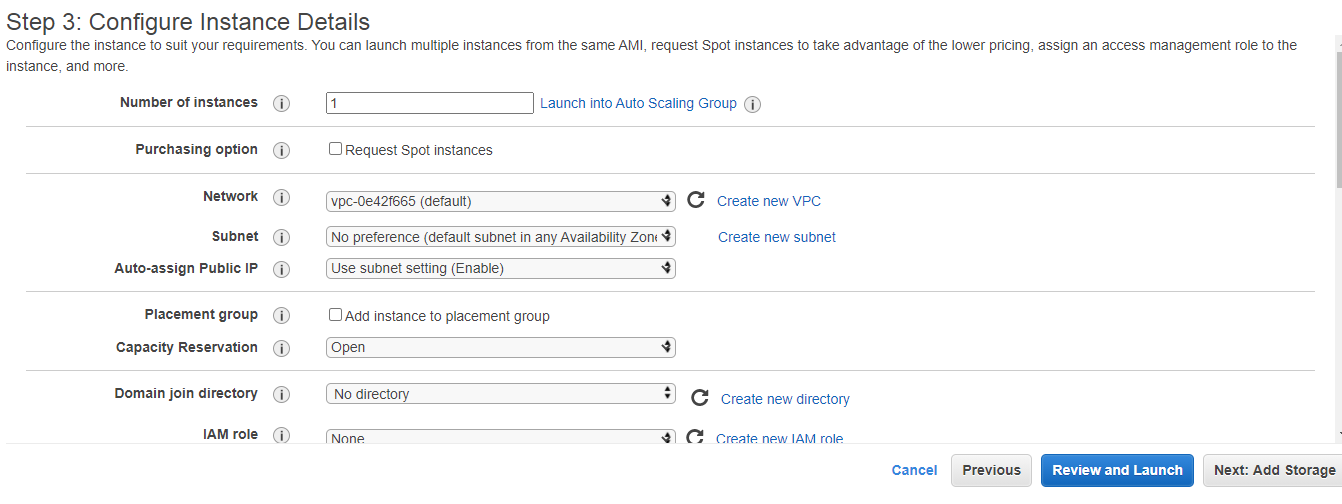
Select "r5d.large" as your instance type and then click "Next: Configure Instance Details".
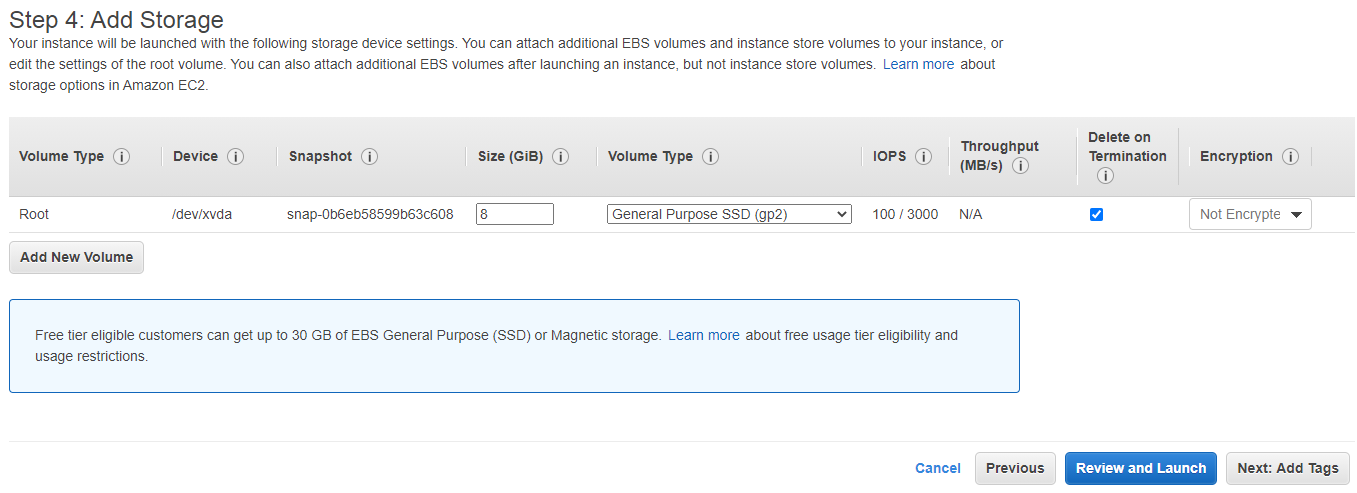
Don't change any setting and click "Next: Add storage".
Click "Next: Add Tags
dg

Move to next page and click "Launch". Choose "Create a new key pair" and give a key pair name in the pop-up window.
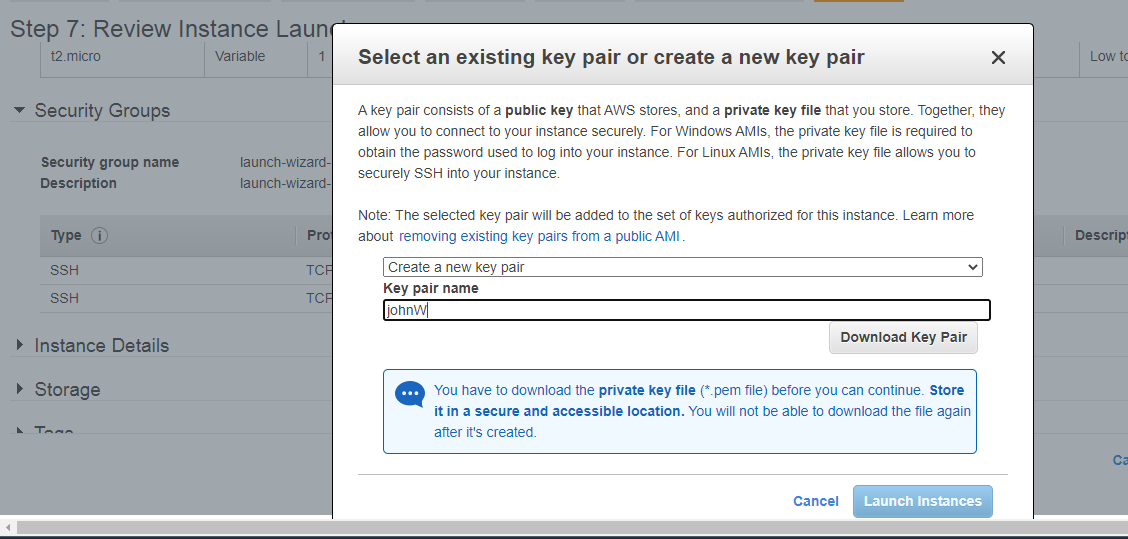
And then click "Download Key Pair". Please keep your key pair in a safe place. It will be used to connect to EC2 from the local machine. After you download the file, click " Launch Instances".

Now you have launched EC2 instance.
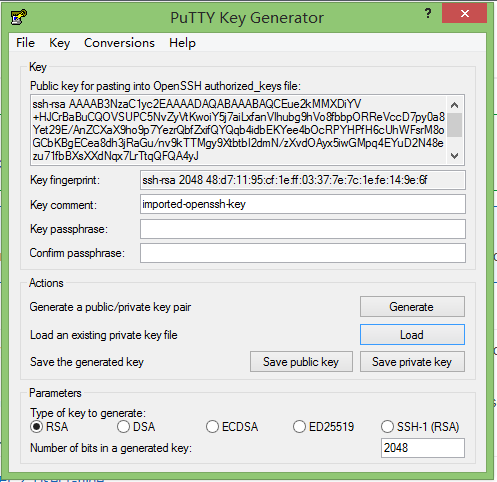
Step 2: Convert public key to private key
Open PuTTY Key Generator and click "Load" to locate the key pair file you download. And then click "Save private key".
Step 3: Connect to EC2 from local
Go to EC2 dashboard and check running instances. Copy "Public IPv4 DNS".

Open PuTTY. At blank of host name, type "ec2-user@" and paste the address you just get.
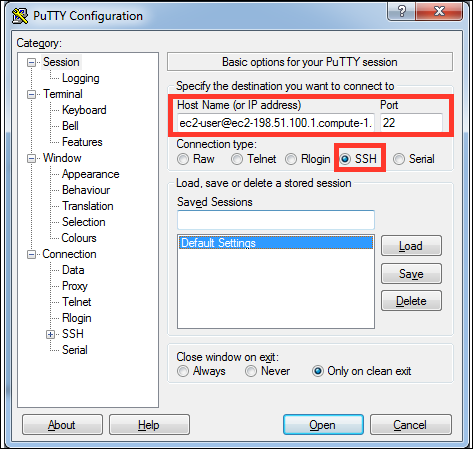
In the Category pane, choose Connection , SSH and Auth. Complete the following:
- Choose Browse , select the .ppk file that you generated for your key pair, and then choose Open.
- Choose Open to start the PuTTY session.

So now you can connect to EC2 instance from local.

Step 4 AWS configuration
Run this command to quickly set and view your credential, region and output format. The following example show sample values.
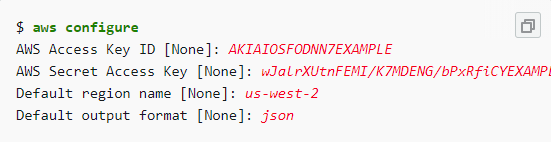
Replace AWS access key id and AWS secret access key to your own ones.
Step 5 Install Python 3, pip 3, and the EB CLI on instance
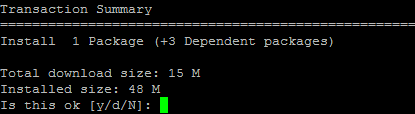
In Linux command line, type as shown in the figure.
[ec2-user@ip-172-31-15-113 ~] $ sudo yum install python36
Type "y" and click enter.
Install pip for python 3. Download the installation script.
[ec2-user@ip-172-31-15-113 ~] $ curl -O https://bootstrap.pypa.io/get-pip.py
Run the script with Python.
[ec2-user@ip-172-31-15-113 ~] $ python3 get-pip.py --user
Use pip to install the EV CLI
[ec2-user@ip-172-31-15-113 ~] $ pip3 install awsebcli --upgrade --user
Step 6 Install Python packages for the project
[ec2-user@ip-172-31-15-113 ~] $ pip3 install tweepy
[ec2-user@ip-172-31-15-113 ~] $ pip3 install pandas
You can check if the packages are installed successfully through the command:
[ec2-user@ip-172-31-15-113 ~] $ pip show pandas
Step 7 Load files into EC2 instance
Use the following command to copy an object from Amazon S3 to your instance.
[ec2-user ~]$ aws s3 cp s3://my_bucket/my_folder/my_file.ext my_copied_file.ext
Eg:
[ec2-user@ip-172-31-15-113 ~] $ aws s3 cp s3://bucket1/hate_5000-1.csv hate_5000-1.csv
Use the same method to load python program "Tweets_scraper.py" into EC2 instance.
Make sure both data and python program are in instance already using the command below.

Step 8 change data file name and output file name in the python code and add your Twitter API token into the code.
[ec2-user@ip-172-31-15-113 ~] $ nano Tweets_scraper.py
Change the load file name to the one you copy to EC2 instance. Add your consumer key, consumer secret, access token and access token secret into the code.
This link is for how to get API Keys and Tokens for Twitter: https://www.slickremix.com/docs/how-to-get-api-keys-and-tokens-for-twitter/

Change the output file name accordingly. If ' hate_5000-1.csv" is your input file, your output file name should be " hate_5000-1-result.csv". Use PgDn to move to the bottom of the code.

After these, press Ctrl+X, y and Enter in order.

Step 9 Run the python program
[ec2-user@ip-172-31-15-113 ~] $ python3 Tweets_scraper.py
Step 10 Save your output file into S3 storage.
Use the command to save file into S3 storage.
[ec2-user@ip-172-31-15-113 ~] $ aws s3 cp hate_5000-1-result.csv s3://bucket1/ twitter-dataCollection/running_results/hate_5000-1-result.csv